
How to Check if Your VPN is Exposing Your Browsing and How to Fix It?
Last Updated: Oct 06, 2026
Table of content:
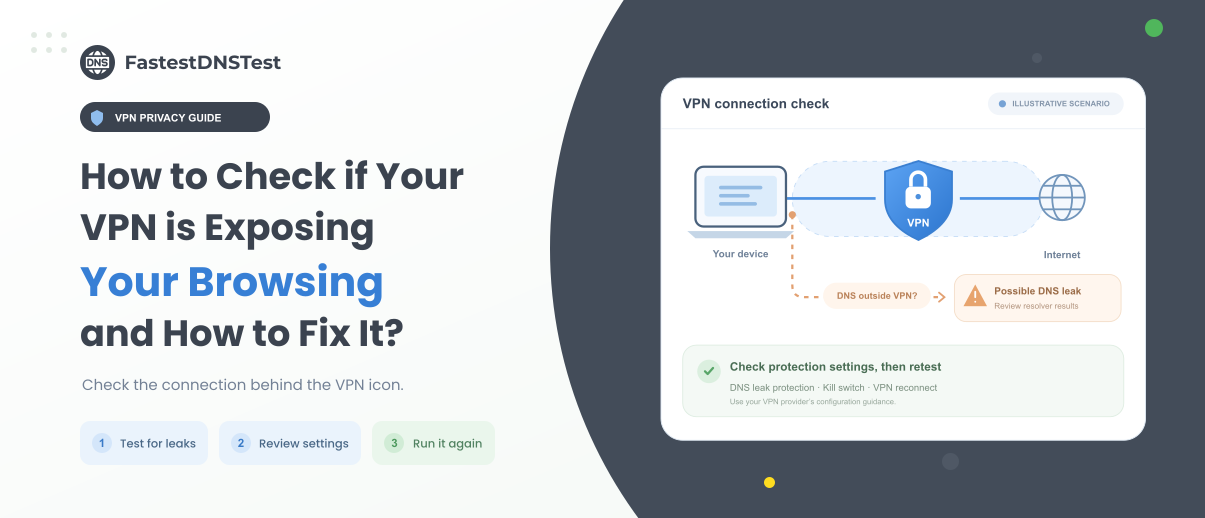
A VPN is built to make your internet connection more private. It routes your traffic to an encrypted tunnel. It secures your real IP address. But if you see a "Connected" message in your VPN app. It doesn't mean that your traffic and information are protected.
VPN leaks can happen for several reasons. Your actual IP address may continue to appear. DNS requests can still go through your ISP or browser features. Such as WebRTC can leak your information outside the VPN tunnel.
Privacy gaps can also occur. It can be incorrect settings, outdated software and poorly configured split tunneling. However, it shouldn’t be difficult to check for such problems.
Now we are going to tell you the most common VPN leaks. We are also going to explain how to test for them and show you what you can do if you discover a problem.
What is a VPN Leak?
A VPN leak happens when your information that should pass through the encrypted VPN connection doesn’t pass through it properly. Instead, it is exposed to your normal internet connection.
Websites or other parties in this scenario can see your information. The information that becomes visible varies by leak type. They can see your information like your real IP address, ISP, DNS requests, approximate location, IPv6 address etc.
This doesn't mean that your whole browsing session is disclosed. Different leaks disclose varying kinds of information. For this reason, you need to test them separately.
There are a few checks that you need to do before fixing anything. So you need to understand the main types of leaks. There are four common areas that are worth checking. These are IP address leaks, DNS leaks, WebRTC leaks and IPv6 leaks.
We are going to explain each type along with the checks and fixes.
IP Address Leaks
Your public IP address is one of the first things to check. The reason behind it is that it can reveal the network you are connected to. It can also disclose your approximate geographical location.
Suppose you connect to a VPN and it is working as you expect. While you are connected to the VPN and visit a website. The website should only see the IP address of the VPN server. The website shouldn’t be able to see the public IP address that your ISP assigns to you.
How to Check Your IP Address?
Start by checking your public IP address without the VPN connected. Note down the results. You need to:
Connect to your VPN
Refresh the IP checking website
Compare the new result with your original IP address.
When the VPN works correctly. The IP address should change to the connected VPN server. Now, if you see that your original IP address is still visible. This suggests that your traffic may not be passing through the VPN tunnel as expected.
How to Fix an IP Leak?
You need to try these basic troubleshooting steps:
Disconnect and reconnect to the VPN
Switch to another VPN server
Restart your VPN
Check Skill Switch in your VPN (enable it)
Update the VPN application
Check for proxy or network settings (interfering with your VPN)
If your real IP address continues to appear. Contact the VPN provider. You should also consider using a VPN which provides stronger leak protection.
DNS Leaks
If your DNS requests are still passing through your normal connection. Then it will not be enough to change your IP address.
DNS converts human-readable website addresses into IP addresses that devices can understand. When you visit a website, your device makes a DNS request. This request helps your device find the server hosting that website.
A VPN should usually route these requests through its protected connection. A DNS leak occurs when those requests bypass the VPN. These are handled by your ISP or another unexpected DNS provider.
How to Check for a DNS Leak?
When your VPN is connected. You then need to run the DNS leak test. Look at the DNS servers reported by the test. If you see your ISP's servers in the report (even after connecting to a VPN). You can have a DNS leak in this situation.
The exact results will depend on your VPN configuration, so seeing a DNS provider that isn't your ISP isn't automatically evidence of a problem.
How to Fix a DNS Leak?
Start by checking the settings of your VPN app. Such as, you need to check DNS Leak Protection. If you can see it. Enable it. You can also:
Update your VPN application.
Review your device's DNS settings.
Remove conflicting custom DNS configurations.
Reconnect to the VPN after changing network settings.
If DNS requests continue to bypass the tunnel. Contact your VPN provider.
After making changes, run the DNS test again rather than assuming the problem has been resolved.
WebRTC Leaks
If you are using an advanced web browser. WebRTC is another domain that you need to check. WebRTC is a browser technology. It is used for real time communication, like voice and video applications. In some specific configurations, WebRTC reveals IP related information that is not expected to be visible.
This doesn’t mean WebRTC is basically unsafe. The concern is if your specific VPN configuration and browser allow information to bypass the privacy protections.
How to Test for a WebRTC Leak?
First, connect to your VPN.
Then use a reputable WebRTC leak-testing tool. Compare the IP information it reports with your VPN connection.
Suppose the test reveals your normal public IP address. You need to examine your browser's WebRTC behavior and your VPN's leak protection features.
How to Reduce WebRTC Exposure?
It depends on your browser and VPN. You will be able to:
Enable WebRTC leak protection in your VPN
Review the privacy settings of your browser
Keep your browser updated
Use a reliable browser extension (particularly for controlling WebRTC behaviour)
When you are installing browser extensions, be very selective. A privacy extension from an unknown developer can create a new privacy risk.
IPv6 Leaks
IPv6 is the new version of the Internet Protocol. It's used to find devices and route traffic on networks.
Some VPN configurations handle IPv4 traffic correctly. However, it can’t properly route IPv6 traffic. IPv6 traffic can potentially bypass the VPN tunnel when this occurs.
How to Check for an IPv6 Leak?
First connect to your VPN. Use an IP leak test tool to check IPv4 and IPv6. If you see your normal IPv6 address. This means your VPN isn't handling IPv6 correctly.
How to Fix an IPv6 Leak?
First, check if your VPN provides IPv6 leak protection. Also check if it offers native IPv6 support. If it isn’t, the possible solutions are:
Update your VPN application
Using a VPN that properly supports IPv6
Enable the IPv6 protection feature of the VPN
Disable IPv6 at the network level
The best solution for everyone is not automatically disabling IPv6. So check your VPN provider’s recommendations before changing this setting.
Router DNS Leaks
DNS leaks occur because of the DNS configuration of your router. Even when your VPN application is configured to protect DNS requests. Your router can still be configured to use your ISP’s DNS servers or other DNS providers.
This becomes more important when you use a VPN on a router and not on an individual device. If the VPN is not handling DNS properly. Devices connected to the router will continue to send DNS requests through the router’s normal DNS configuration.
A router DNS leak doesn’t mean that all of your internet traffic is leaked. The main issue is that DNS requests can reveal the domain names your device is trying to access to the DNS provider handling those requests.
How to Check for a Router DNS Leak?
First, connect your device to the router. Connect to your VPN.
Then run the DNS leak test. Check the DNS servers that the test reports. Compare them with the DNS servers you expect your VPN to use.
If the test consistently shows your ISP's DNS servers while your VPN is active. You need to review your VPN configuration. You may also need to review the router's DNS settings.
Moreover, you need to check if the VPN is running directly on your device or at the router level. The troubleshooting steps can be different. It depends on the VPN configuration.
How to Fix a Router DNS Leak?
Start by checking the DNS settings in your router's administration panel. Look for settings such as:
DNS server
Primary DNS
Secondary DNS
WAN DNS
DHCP DNS
Custom DNS
If the router is configured to use your ISP's DNS servers. You need to check if your VPN provider recommends different DNS settings or provides its own DNS servers. You can also:
Enable DNS leak protection in your VPN
Check that your router's VPN configuration includes DNS routing or DNS leak protection.
Remove unnecessary custom DNS settings
Update the firmware of your router.
Check if IPv6 DNS settings are configured separately.
Restart the router and reconnect the VPN.
After making these changes. Run the DNS leak test again. Don't assume that changing the router's DNS server fixes the issue automatically. The important thing is to verify the DNS servers handling your requests, actually.
If your ISP's DNS servers continue to appear. You need to check the VPN's router setup instructions. Some VPN configurations may require specific firewall, routing or DNS settings. This prevents DNS requests from bypassing the VPN tunnel.
Conclusion
A VPN can provide an additional layer of privacy. But just seeing a “connected” status doesn’t mean that your browsing information is completely protected. All the common areas can create privacy gaps. It depends on your device, browser, network, router and VPN configuration.
The good thing is you can identify such issues with just a few simple checks. You need to start by comparing your IP address. Check it before and after you connect to the VPN. Then check your DNS servers. Test for WebRTC exposure and verify whether IPv6 traffic is handled correctly. If you use a VPN through your router. Don't forget to review the router's DNS and VPN settings as well.
FAQs
Does a VPN leak all of my browsing activity?
No. The amount of information exposed depends on the type of leak. It also depends on how the VPN is configured. A leak may expose specific information. For instance, it can expose an IP address or DNS requests. However, it will not expose the entire browsing session.
Can VPN leaks happen on mobile devices?
Yes. VPN leaks don’t just happen on desktop computers. Mobile devices can also experience privacy issues. This is because of their network configuration, operating system settings, VPN applications or browser behavior. It is useful to test your VPN on each type of device where you use it.
Can public Wi-Fi cause a VPN leak?
Public Wi-Fi doesn’t automatically cause a VPN leak. But network restrictions or unusual network configurations can affect how a VPN connection works. If you use a VPN on public Wi-Fi. You need to check that the VPN remains connected. You also need to verify its behavior with the leak test tool.
Can changing VPN servers fix a leak?
It happens but not all the time. Sometimes switching servers helps identify whether the problem is related to a particular server or connection. However, changing servers does not automatically fix every type of leak. If the same issue occurs across multiple servers. You should review your VPN, device, browser or network configuration.
Should I test my VPN regularly?
Regular testing is helpful. It is especially useful after changing your VPN settings, router configuration or network etc. It can also help you notice configuration changes that may affect how your VPN handles traffic.
Can VPN leaks happen when using a VPN on a router?
Yes. A router based VPN has additional configuration considerations. This is because the router controls network traffic for connected devices. Its DNS, routing, IPv6, firewall and VPN settings can affect traffic handling.